java -jar jLug.jar
C:\Program Files\Ldraw, enter C:\Program Files.
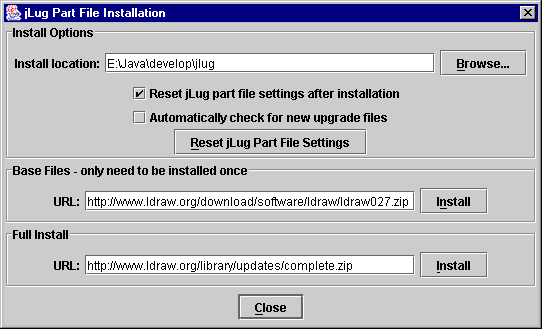
If the Rest jLug part file... checkbox has a tick, then every time part files are installed jLug's configuration settings are changed to pick up the files from the new Install Location directory. This is the same action performed by the Reset jLug Part File Settings button.
As mentioned above, the Reset jLug Part File Settings button updates jLug's config settings for the Install Location. To be exact, it defines which directories jLug searches when looking for parts, and where the parts list file is located. The part file directories and parts list file can be viewed and changed in the Preferences dialog, under the Files tag.
The Base Files section allows you to download and unzip the base files. These contain all the original part files from 1997. Note, the zip file also contains the LDraw software and other executables. These are not extracted or installed as they only work with Windows PCs.
The Full Install section allows you to download and unzip the latest full set of amended part files.
Basically, this does exactly the same as the Base Files installation, but with different zip file.
If you wish to download and install any of the upgrade files available from LDraw.org, you can simply change the URL to point to the relevant update zip file.
Adding parts - Find the part you want in the parts list in the left hand side.
Then click-n-drag the part into the main editing canvas to the right.
The first part should appear in the center.
Further parts should appear on top of the previous part.
Changing the view - The view in the main editing canvas can be changed with either the middle mouse button or, if your mouse doesn't have one, Alt+any mouse button.
| Key/Button | Alternative | Action |
| Middle | Alt+Any | Rotate view |
| Ctrl+Middle | Ctrl+Alt+Any | Zoom in/out |
| Shift+Middle | Shift+Alt+Any | Pan view |
| Key | Action |
| Ctrl+X | Cut selected part |
| Ctrl+C | Copy selected part |
| Ctrl+V | Paste part |
| Del | Remove selected part |